
 Canada
 Euro
Euro
 Australia
 Pound
Pound
 Peso
Peso
 Singapore
 Bahraini Dinar
 Malaysian Ringgit
 Qatar
Qatar
 Russian Ruble

Do you want your Porsche 992 GT3 to resemble the iconic 1973 911 RS with the unique ducktail spoiler? Now you can, with Fabspeed’s New 992 GT3 Wing Delete Kit. Fabspeed is the first company in the world to 3D Laser scan, test and sell a Wing Delete Kit for the 2022 992 GT3 cars that came equipped with the swan neck rear spoiler. This Fabspeed system fits all 992 Porsche GT3 swan neck equipped cars worldwide.
Click Here To Watch Full Video Instructions
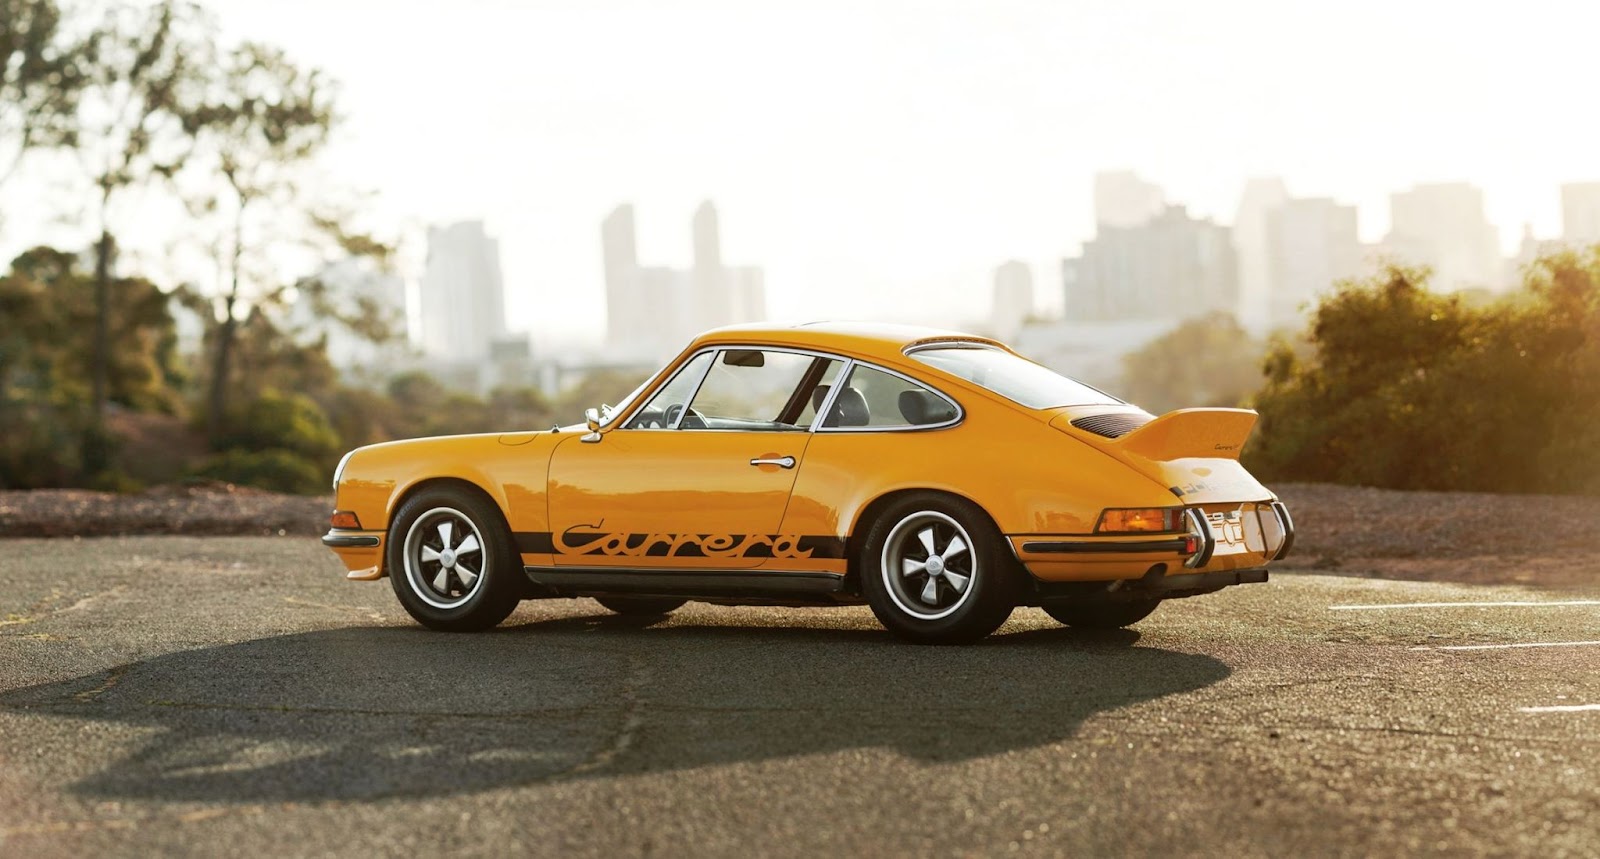
The beauty of this invention is that in 15 minutes to a half hour or so, you can change the total appearance of your 992 GT3 from the swan neck 2022 technology, to appear to be a 992 GT3 touring. This more street oriented look with a 1973 ducktail is stunning and an unforgettable classic. This softened duck-tail looks a great deal better than the plain jane 992 GT3 touring rear end that simply slopes down and tapers off!.
Now our Master Tech, Michael Stupkah presents the instructions of how to install the 911 Carrera 992 GT3 Wing Riser Delete Kit, in the video below as well as hand written instructions.
What You'll Need To Do This Install
- Socket wrenches
- ⅜ and ¼ inch drive
- Extension to make things easier
- 13 mil for a few bolts holding down the deck lid
- T-30 for Wing
- T-25 for bits of trim
- 8 Millimeter for mounting tabs on the wing risers themselves
- Plastic pry-bar to get the wing down
The 1st step of the process is to remove the wing. The 4 inch painters green masking tape is great for paint protection. Now that we have the protection down, we’re going to remove the 4 T-30 bolts that hold the wing onto the 992 GT3.
Once all 4 bolts are removed, we’re going to take a plastic pry bar and free the wing. Keep in mind, if you do want to reassemble your car with the wing, there are two types of fasteners. The bolts with the shoulders on them go on the rear.

Now that all 4 bolts are removed, we’re going to take a plastic pry bar and remove the wing.
Now that the wing is out of the way, we’re going to remove the rear decklid. With the oil cap popped, you can lift that up and the one on the other side is held in place and should pull right out. The other panel pops right out as well.
Next, moving on to the bigger portion of the rear decklid, there’s two 13 millimeter bolts. You can also use a triple square if you’d like, but I prefer the 13 mil. With the two 13 mil bolts removed, the rear decklid should pull right out.

Next you remove the 6 T-25 Bolts. Before we remove the other part of the decklid, we’re going to reach under the right side rear opening and disconnect or unplug the third brake light. Now the entire assembly will be able to come out. Be sure to lift the lid vertically with caution to avoid scratching the paint.
Next we’re going to pop out the wing risers. The bolts securing the wing risers are all 13 millimeter.

As you can see in the photo below, we have the factory wing riser and our delete. You can tell from looking at the foundation that these are 3D printed and a direct match guaranteeing a perfect 3D laser fit.
Now before you install our delete plates on the vehicle, we’re going to swap out the mounts for a part of the decklid. Now that the mounting tabs are mounted, we’re going to go ahead and put the riser delete on the car.

After the delete plates are installed on the vehicle, it is time to begin reassembly. First let's plug in our third brake light and begin to put the deck lid on. The mounting tabs on the plates themselves have adjustability, you want the panel gap on both siders to be nice and lined up with the window. It may take a few tries. When you install the other half of the decklid, you want to emulate a forward sliding motion because there are mounting tabs
Before tightening down the 14 millimeter bolts, make sure your panel gap is nice and even on both sides.
And there you have it! That’s everything you need to do to turn your 992 GT3 from a swan neck to a touring look. It’s a simple job you should be able to do yourself.
In addition to this incredible product, check out the rest of our fantastic product suite for the Porsche 992 GT3

